#9: Getting Stuff you Download to Compile
Interpreted vs Compiled Languages
There are two ways of running code, interpreted or compiled.
Each language usually only uses one type, some examples below:
(Mostly) interpreted languages:
- Python
- Ruby
- Javscript
(Mostly) compiled languages
- Java
- C
- Rust
Running Interpreted Code
A program (interpreter) reads the human-written code in real time, analysing the text written and converting that into instructions that the interpreter executes as it reads them. Other code files can be dynamically referenced, utilising code from other project files or installed libraries.
This, however, means that errors in code won’t be picked up until they’re reached by the interpreter.
Running Compiled Code
A compiled language needs to be compiled before it’s run. This is done by a program (compiler), reading the human-written code and converting the text into another language, usually object code (like a C compiler) or a binary intermediary (like a java compiler), instructions that can be read and executed by the machine directly.
Object code is specific to the target operating system and hardware architecture, as the instructions are executed by the target kernel. The specificity of object code is why compilation needs to be done by the user after downloading the source code.
It is much faster to run the compiled code vs interpreted code as the text doesn’t need to be lexically analysed as it runs.
Compilation can also be done for other machines with different specifications (cross-compiling), but some build systems may not allow this.
How is code compiled?
Converting a set of source code files into one executable is done through building.
Building consists of compilation and linking:
-
Compilation: conversion of source code files into a set of object code files
-
Linking: conversion of a set of object code files into one executable
Is it better to download executables or source code?
Downloading source code instead of compiled executables is much safer as the source code can be read through to ensure no malware is packaged with the files. This also allows source code to be read and edited to fit requirements before building, also can edited for debugging.
Build Systems
Instead of having to deal with manually compiling, linking, and managing dependencies, build systems are available. These automatically detect hardware architecture and OS (if differences aren’t specified, and build the source code files for the user automatically.
These often use specific data files that specify dependencies, versions, and how to compile and link the source code files.
Examples of common build systems:
GNU makemsbuildbazelmesonmavengradle
When choosing a build system to use, try to prioritise a build system that is popular, well-suited to your most-used project programming languages, and versatile.
How to use build systems
To find what build system a project uses, one good way is finding a file in the project root directory that often looks human readable and out of place with the others.
Build data file examples:
Makefile(GNU make)build.ninja(ninja)BUILD.bazel(bazel)PROJECT.csproj(msbuild)pom.xml(maven)
Googling this will usually tell you how to build it, if the repository doesn’t already specify the build instructions. Before building, the build system might need to be installed first, and the usage of the build system CLI can be found through either googling, or CLI explanation tools like tldr or man.
IDEs like VSCode will also often automatically detect build systems and files, and allow extensions/plugins to be installed to build the project in the IDE.
Building and running can also be done in containers like docker, and this is useful because building projects often requires downloading required dependencies. These can take up a lot of space on the host OS, so keeping them in a docker container stops more storage being used up when not required.
Examples with common build systems
| Build System | Build | Clean Existing Object Files | Build Debug | Run Tests |
|---|---|---|---|---|
| GNU make | make |
make clean |
make -d |
N/A |
| Maven | mvn install |
mvn clean |
mvn -X install |
mvn test |
| Gradle | gradle build |
gradle clean |
gradle build -d |
gradle test |
Types of Executables
Executables can be built as standalone executables, or with dependencies. Standalone executables don’t require dependencies to be installed on the host os, as they include the dependency code inside them. Executable files with dependencies refer to installed libraries to access code, but these libraries need to be installed on the host OS to run.
Standalone executables are a lot more portable, but are larger than their dependency-reliant counterparts. They can be quicker and smaller to install if the dependencies aren’t often used, but if many executables require these dependencies, then it’s often more storage-efficient to use dependencies.
The type of executable can often be specified in the build options.
Common Errors
Dependency Errors

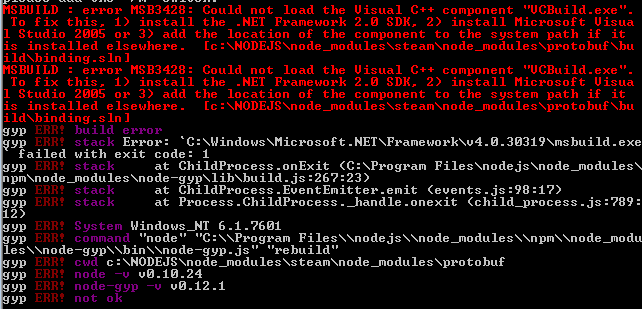
Dependency errors occur when the code being compiled cannot access a method, object, function, or class required to run. These are often resolved with some build systems installing dependencies for you, but if this isn’t possible, manually installing the code dependencies with the language package manager of your choice is required.
Some examples of package managers for programming languages:
gradle(java)go modules(go)cargo(rust)
However, the dependency might have to be installed via software package manager like apt, yum, pacman, or whatever’s most used on your system. Your best bet for finding the dependency to install if the above two options don’t work is, again google.
Version Errors

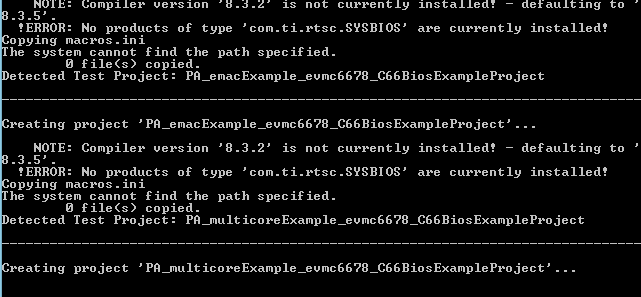
Version errors occur when there is a mismatch between versions for the compiler, dependencies, or code itself. This can be resolved by specifying the versions of the affected code/software in the build options, and sometimes installing earlier versions of dependencies if later versions break the code.
Other Errors

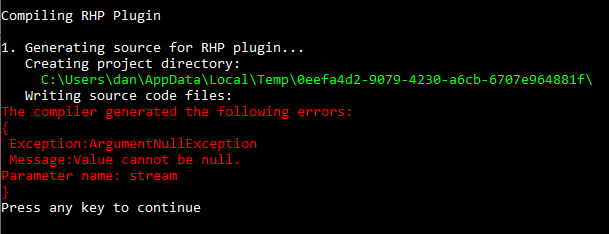
Most compilers will provide an error code along with the error, and googling this will most likely lead you to documentation, or other recommended solutions online.
Tutorial Example Projects
Before following the tutorials below, install the corresponding build systems with the package manager of your choice (apt, pacman, yum, etc.)
GNU Make
Note: Watch how GNU Make prints the commands it’s executing (specified in Makefile) as you run make / make clean.
git clone https://github.com/remonbonbon/makefile-example - Clones the example repository from Github.
cd makefile-example - Enters the makefile-example directory.
cat Makefile - Prints the Makefile file to read the make instructions (even if you don’t understand, helpful to have a look at.)
make - Builds the project.
./app - Runs the compiled executable.
make clean - Deletes the compiled binary.
make -d - Builds the project with debug info.
Cmake
Note: Sometimes, you might see a file called CMakeLists.txt in the repository root. In this case, the command cmake should be run with the repository directory as an argument to generate the Makefile.
git clone https://github.com/pyk/cmake-tutorial - Clones the example repository from Github.
cd cmake-tutorial - Enters the cmake-tutorial repository.
cat CMakeLists.txt - Prints the CMakefile to read the instructions used to generate the Makefile.
cmake . - Generates the Makefile. (Follow make instructions above to build project.)
Maven
git clone https://github.com/jenkins-docs/simple-java-maven-app - Clones the example repository from Github.
cd simple-java-maven-app - Enters the simple-java-maven-app directory.
cat pom.xml - Prints the pom.xml file to read the maven data file.
mvn test - Runs a test for the source code files in the project.
mvn install - Compiles and builds the source code files in the project.
java -jar target/my-app-1.0-SNAPSHOT.jar - Runs the compiled JAR file.
mvn clean - Deletes the target directory as well as all contained files and directories, including the compiled JAR file.
mvn install -X - Builds the project, logging debug information.
Gradle
git clone https://github.com/gradle/native-samples - Clones the example repository from Github.
cd native-samples - Enters the native-samples directory.
cd cpp/application - Enters the application directory for the C++ example project.
Note: Repositories using the Gradle build system often include a gradlew executable. This is a built-in wrapper for the gradle build system that automatically downloads the required gradle version and uses it to build the source code files in the project. For some legacy projects, or if the user doesn’t have/want to install gradle, ./gradlew can be used in place of gradle for the later commands in this tutorial.
cat build.gradle - Prints the gradle build file to read the build options.
cat settings.gradle - Prints the gradle settings file to read the build settings.
gradle test - Runs a test for the source code files in the project.
gradle build - Compiles and builds the source code files in the project.
./build/exe/main/debug/app - Runs the compiled executable.
gradle clean - Deletes the build directory as well as all contained files and directories, including the compiled executable.
gradle build -d - Builds the project, logging debug information.
Interpreted Languages
Although interpreter languages don’t need to be compiled, they’ll often require dependencies to be installed for it to run.
These are usually installed with package managers that might come installed with the language, some examples are pip for Python, and RubyGems (gem) for Ruby.
Note: for Python, it’s recommended to run pip3 to ensure that you’re running pip3, to install packages for python3, and not pip2 for python2 (outdated), which may also be called pip.
Dependencies are usually stored in a configuration file that can differs with the package manager, like package.json for npm (NodeJS), or requirements.txt for pip (Python).
Searching for the details for specific languages online is a good way to understand what you have to do.
Examples
pip (Python)
pip3 install [PACKAGE] - Installs a package.
pip3 install -r requirements.txt - Installs all dependencies from a requirements.txt file.
pip3 uninstall [PACKAGE] - Uninstalls a package.
pip3 list - Lists all packages.
npm (NodeJS)
npm install [PACKAGE] - Installs a package.
npm install - Installs packages from a package.json file in the local directory.
npm uninstall [PACKAGE] - Uninstalls a package.
npm update [PACKAGE] - Updates a package.
Virtual Environments
Installing lots of package depencencies systemwide can waste a lot of storage after downloading and running multiple app.
There may also be issues with system package conflicts, and some package managers like pip might remind you of that.
To solve this, you can use virtual environments to compartmentalise language instances with separate library dependencies installed.
There are lots of different tools to create and manage virtual environments, especially for Python, such as venv (built-in with Python3.3+) anaconda, and pipx.
Example with venv
echo -e 'import cowsay\ncowsawy.cow("Hello World!")' > cow.py - Writes Python code to file.
python3 -m venv venv - Creates virtual environment in venv directory (second venv argument is the directory name).
source venv/bin/activate - Activates virtual environment, redirects python3 and pip to refer to virtual environment binaries through PATH enrivonment variable.
pip install cowsay - Installs cowsay package.
python3 cow.py - Runs Python script.
deactivate - Deactivates virtual environmnent.
Output:
  ____________
| Hello World! |
  ============
            \
             \
               ^__^
               (oo)\_______
               (__)\       )\/\
                   ||----w |
                   ||     ||
Licensed under CC BY-NC-SA.